 * * * * *
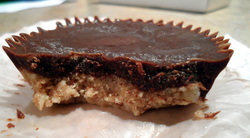
This recipe gets 5 stars! These didn't last very long at all because they were so good! These were the perfect little dessert and a great quick snack! I found this recipe on Pinterest and it's from Angela at the Oh She Glows blog. I knew right when I saw the picture of the almond butter cup that I just HAD to try it! Lately, I've really been getting into raw desserts and so far I've been loving every single one of them! I find them refreshing on hot summer days. Raw desserts also have that interesting appeal to them and I love that they're different than other desserts that I've already tried. Also, as an added benefit, they're usually much more healthier than a non-vegan dessert, packed with a lot of protein, they typically don't contain a lot of processed ingredients or any at all, and some of them are high in fiber (such as recipes that use dates). Anyways, if you're looking for a great raw dessert to try out this one is great!
What I Did Differently: I didn't have the silicone muffin pan so I used a metal muffin pan with paper liners. I had some trouble with the chocolate sauce leaking down the sides of the nut mixture so I had to make a double batch of sauce. I think this happened because I wasn't able to really push down the nut mixture and create a seal proof edge without disturbing the paper liner too much. This still turned out great though! I would just use a silicone muffin pan or make a double batch of chocolate sauce! Overall Thoughts: I really love this recipe and I will be making these again! I think it would be interesting to change up what nut butters to use. Next time I want to try a natural peanut butter. I don't think it will be very long before my Hubby asks me to make these again!
Are you looking for a restaurant that serves up some awesome vegan and/or vegetarian food in the Milwaukee area? I've got the place for you! You MUST check out Café Manna in Brookfield! They have absolutely AMAZING food! I was so impressed with their menu because they offered such a great variety of choices. They offer vegan, vegetarian, gluten free, and raw choices (yep, no meat)! I couldn't hide my excitement and my husband couldn't help but to chuckle to himself a bit! He was probably thinking, "What kind of place did my wife bring me to now?" Eh, he knows me...I'm always full of surprises!
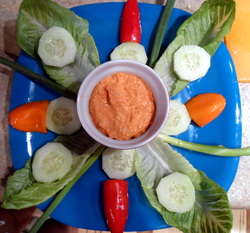
This cute little café is Wisconsin's first certified green restaurant! They use local ingredients as much as possible and the ingredients are either grown organically or by using sustainable farming practices. I feel that the food is decently priced taking into consideration the quality of the ingredients. The portions are pretty generous. The food is amazing. The service is great. What more could you ask for? 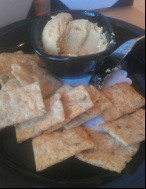 They started us out with a free cashew hummus platter. I apologize for the terribly blurry photo. My camera lens on my phone was dirty! We've never had a cashew hummus before and we both agreed that it tasted great! It was slightly sweet and it wasn't heavily seasoned. I think it was the perfect way to start out!
 Argh, time to clean that camera lens! We ordered a cup of the watermelon gazpacho soup and it was absolutely delicious and a perfect refresher for the hot summer day because it was served cold! Don't worry, I finally figured out that it was my lens that was dirty and not my picture taking skills.
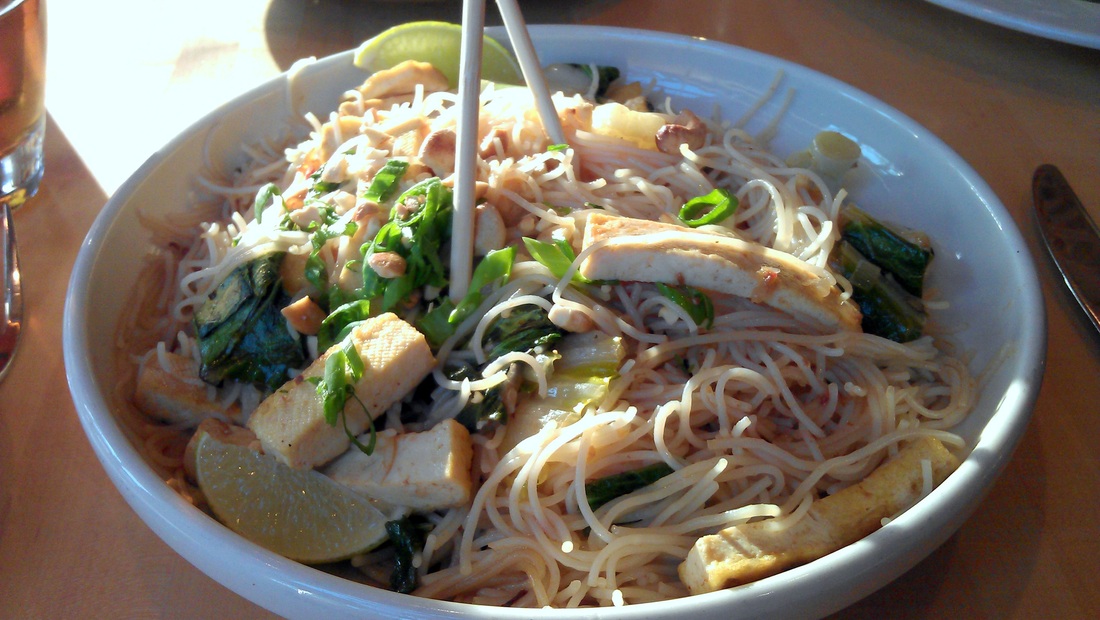
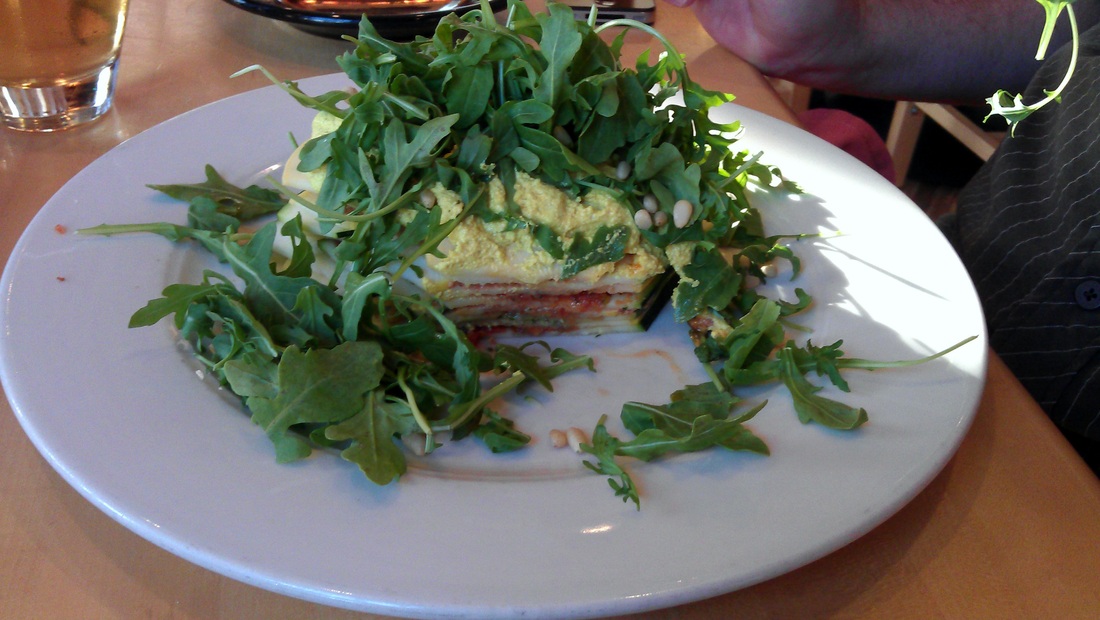
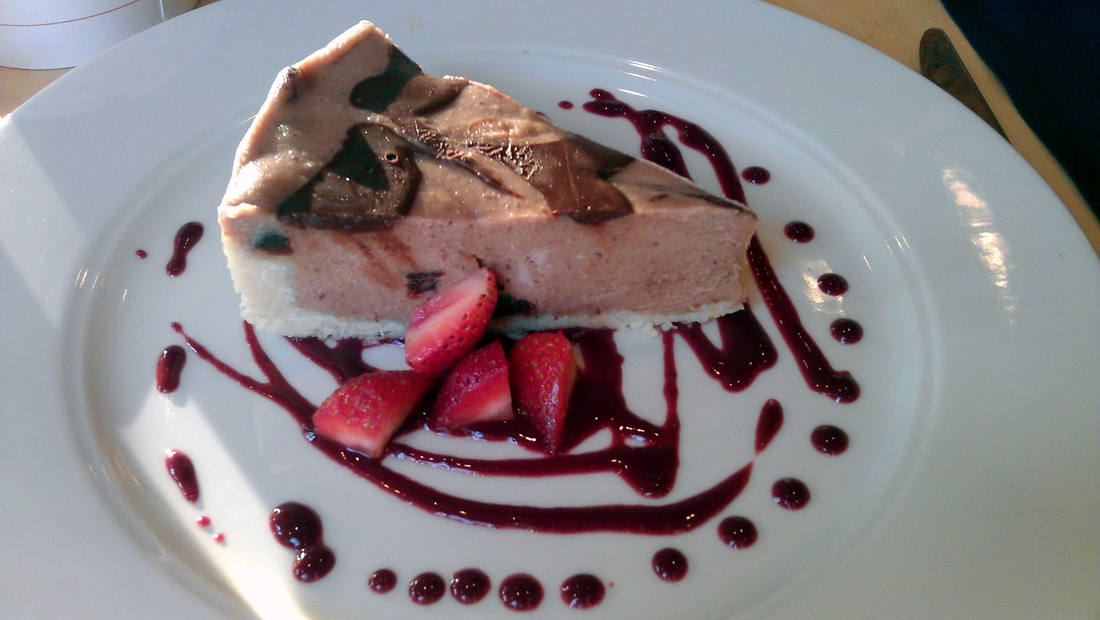
Ta da! What a world of a difference that a clean lens makes! This dish is the Vegan Pad Thai. It also comes vegetarian if you wish. This came with a side of hot chili sauce. Oh. My. Goodness. This dish was absolutely amazing!!! It's actually the BEST Vegan Pad Thai that I've had yet! I was absolutely in-love and it was hard not to eat the whole dish but I was saving room for dessert! This is what my husband ordered! It's the Raw Lasagna and it's also vegan! Props to my hubby for ordering this awesome nutritious dish! This dish had a huge "WOW" factor. It was just absolutely amazing and it pretty much left me speechless as to how good it tasted. I think I could eat this every day and not get sick of it! Doesn't this picture just make you stop to drool? It looks just as great as it tastes! This is the Raw Cheesecake which is also vegan. The flavors vary per the Chef and the flavor that day happened to be Chocolate Cherry. I think my heart stopped when our waitress said that because chocolate and cherries are two of my favorite things! We ordered one slice per each of us...if I would've known how generous their slices were then I would've ordered one and shared! However, I didn't have any trouble finishing it off! This cheesecake was absolutely delicious! I was very impressed with the texture of it; very smooth and very much like a regular cheesecake but not quite as dense, which I think is even better! Ha! Take that dairy cheesecakes...you have been conquered by something better and it's not full of animal products! Ok, I'll compose my excitement now. Seriously, you need to try this so save room for dessert!
Overall, our service was great! I really liked our waitress because she was extremely informative, passionate about the restaurant and the food, and was very attentive. We really had a great time and we will definitely be going back again! I highly recommend this restaurant to any vegans and/or vegetarians out there as well as the meat eaters because I believe that you won't be missing your meat if you know what good food is all about!
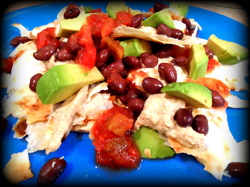 * * * * *
I give this recipe 5 stars! It's such a simple recipe to make and it tastes absolutely delicious! I found this recipe on Pinterest and it's from Ashley at the Edible Perspective blog. Besides the time that it takes to soak the cashews, this meal can be made up in about 10-15 minutes (if you already have tortillas or tortilla chips on hand)! I really love the cashew cream because it complimented the other flavors in the dish. I like that the cream didn't have any nutritional yeast in it because I find that when recipes use nutritional yeast as the main "cheese" flavoring that it's overpowering. I love to sprinkle a bit of nutritional yeast on top of dishes as an alternative to parmesan cheese but as far as making it the main flavor for a "cheese" replacement...no way! I've tried several vegan macaroni & cheese dishes that used varying amounts of nutritional yeast as the main "cheese" flavoring ingredient and I personally found it disgusting. This recipe however, is right up my alley and it tastes fantastic! My husband and I made this our meal for dinner last night & it was perfect!
What I Did Differently: I didn't make the corn tortillas because I had some really nice organic white flour tortillas on hand. So, I just toasted up the tortillas in a pan, without any oil, until crispy and then broke it up into pieces. It worked perfectly! I also added a bit more salt and cumin to the cashew mixture because I used a little more water. Overall Thoughts: I will definitely make this again! Next time, I would love to make my own corn tortillas because I think it would make this dish even more spectacular!
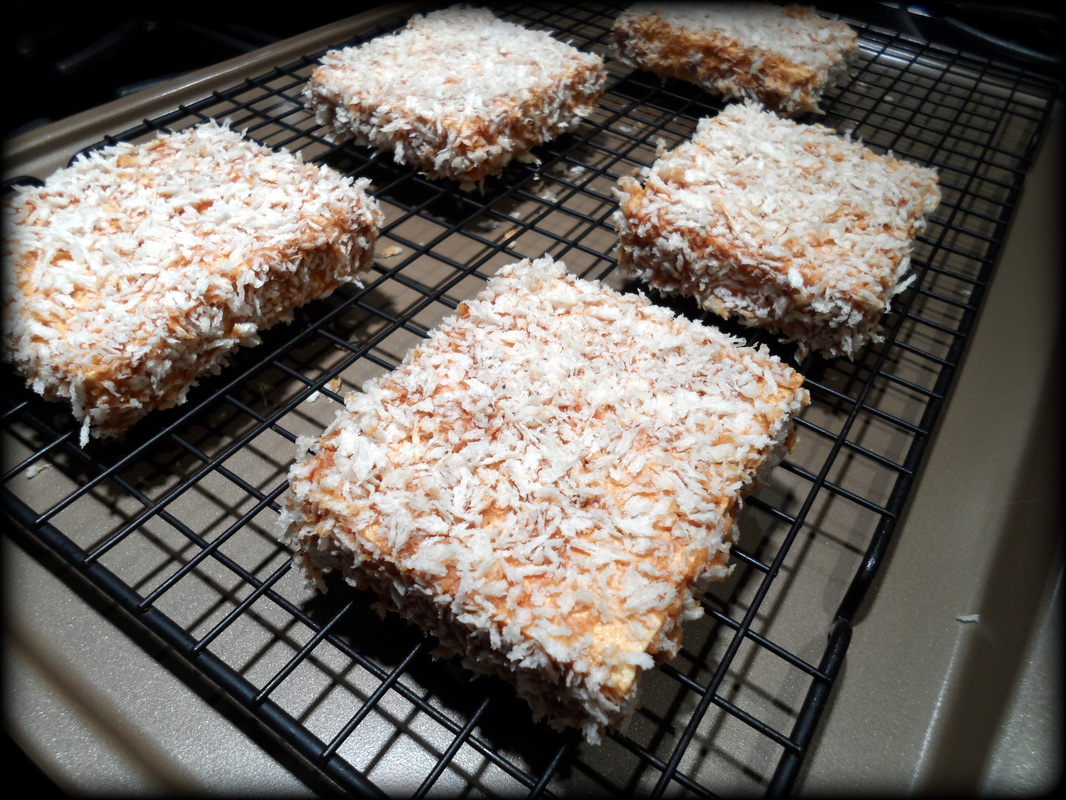
 This sandwich is pure awesomeness! I wanted to cook something up that uses pretty basic ingredients and doesn't take extensive hours in the kitchen but creates a "knock your socks off, restaurant quality at home" type of sandwich. I think I did a pretty darn good job! The crispy coating on this tofu is incredible! This recipe only uses 8 simple ingredients and I was really impressed by the flavor of this sandwich! It definitely has that "WOW" factor! I was inspired to make this after trying the "Tofu Steak" sandwich at Outpost Foods a couple of weeks ago. Their tofu sandwich is breaded and topped with some caramelized onions on a ciabatta bread that is spread with some vegan mayo. Their sandwich inspired me to explore more tofu sandwich options.
Lately, I've been craving barbecue! I didn't want to just slather some barbecue sauce on the tofu and grill or bake it and call it a sandwich! Nope, I wanted something more spectacular, something that would stand out from the ordinary. After searching the internet for quite some time and not finding the exact type of sandwich that I was looking for, I decided to make one up myself! So here's the recipe for this beauty!
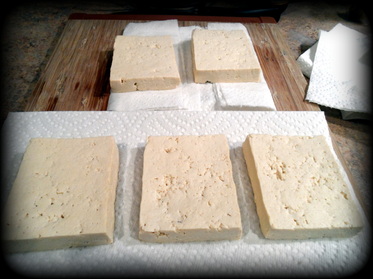
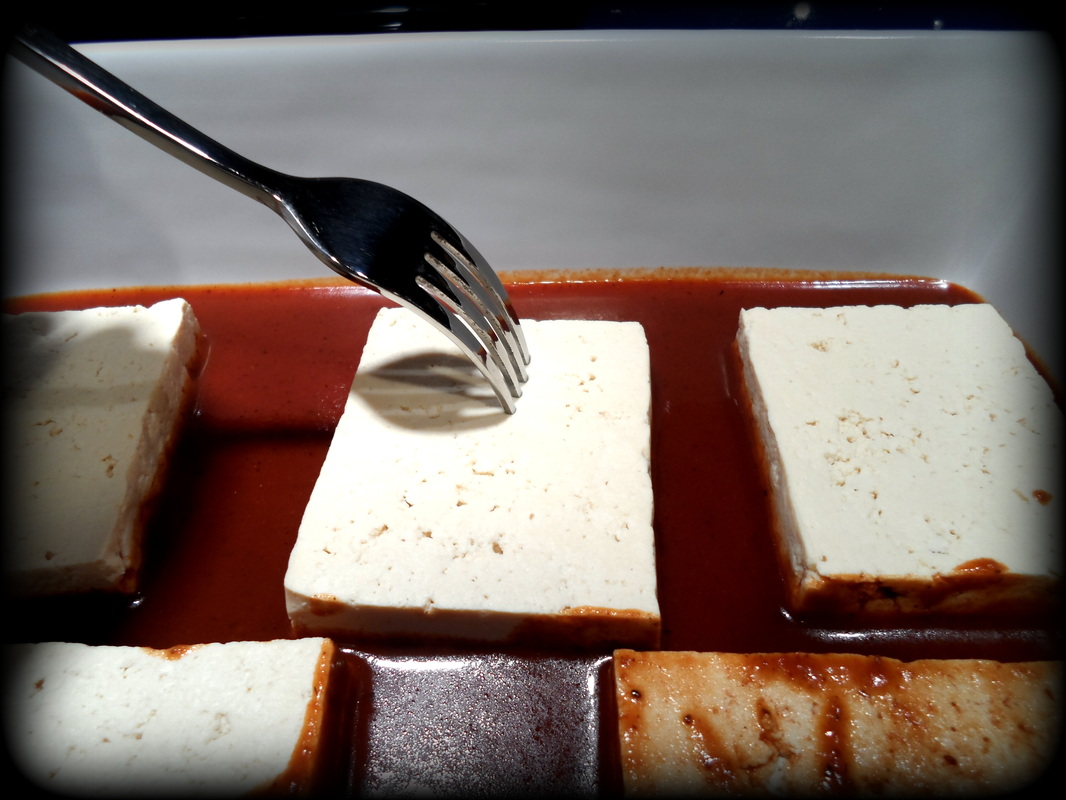
Ingredients: 1 block firm tofu, sliced into 1/2'' thick slices width-wise ( I got 5 slices)
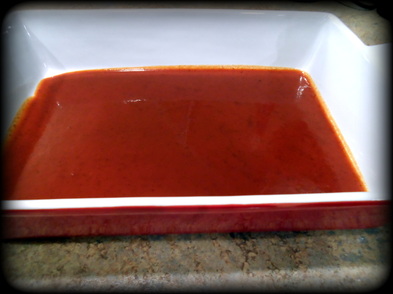
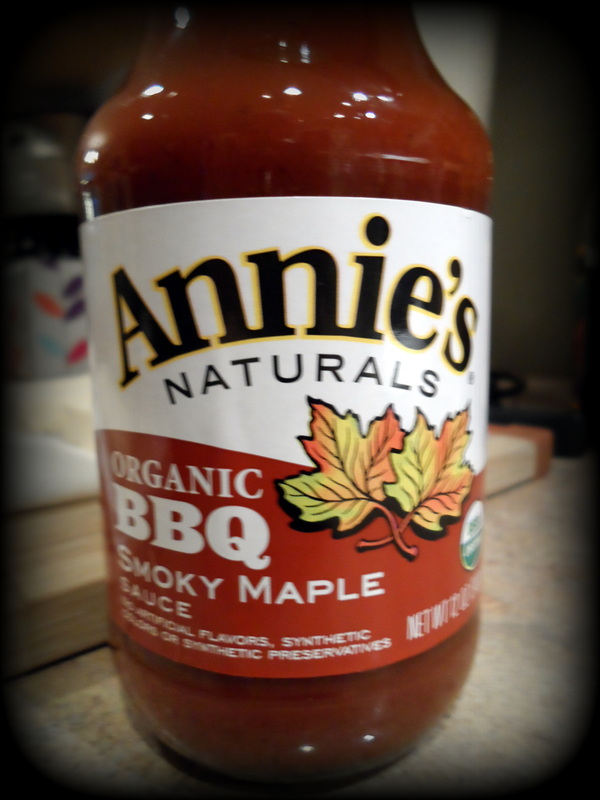
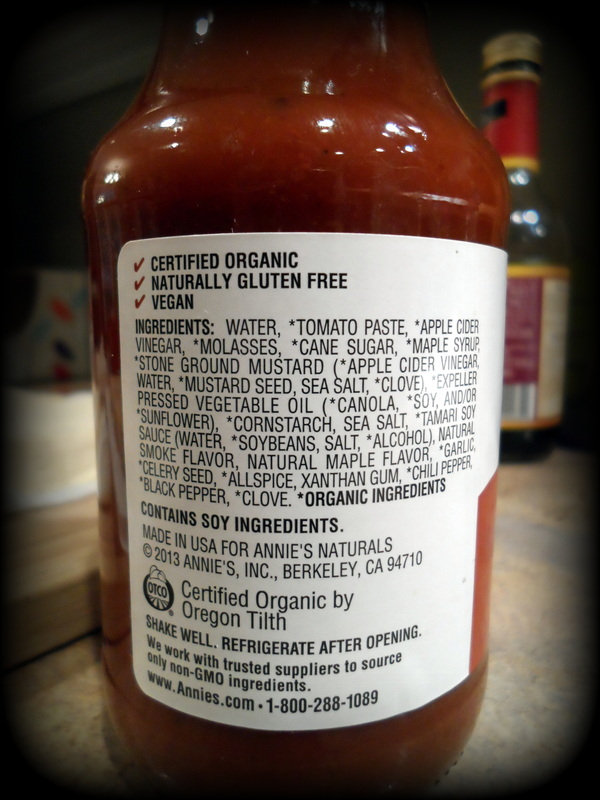
About 1 cup of vegan barbecue sauce (such as Annie's organic Smoky Maple), you may need extra for topping
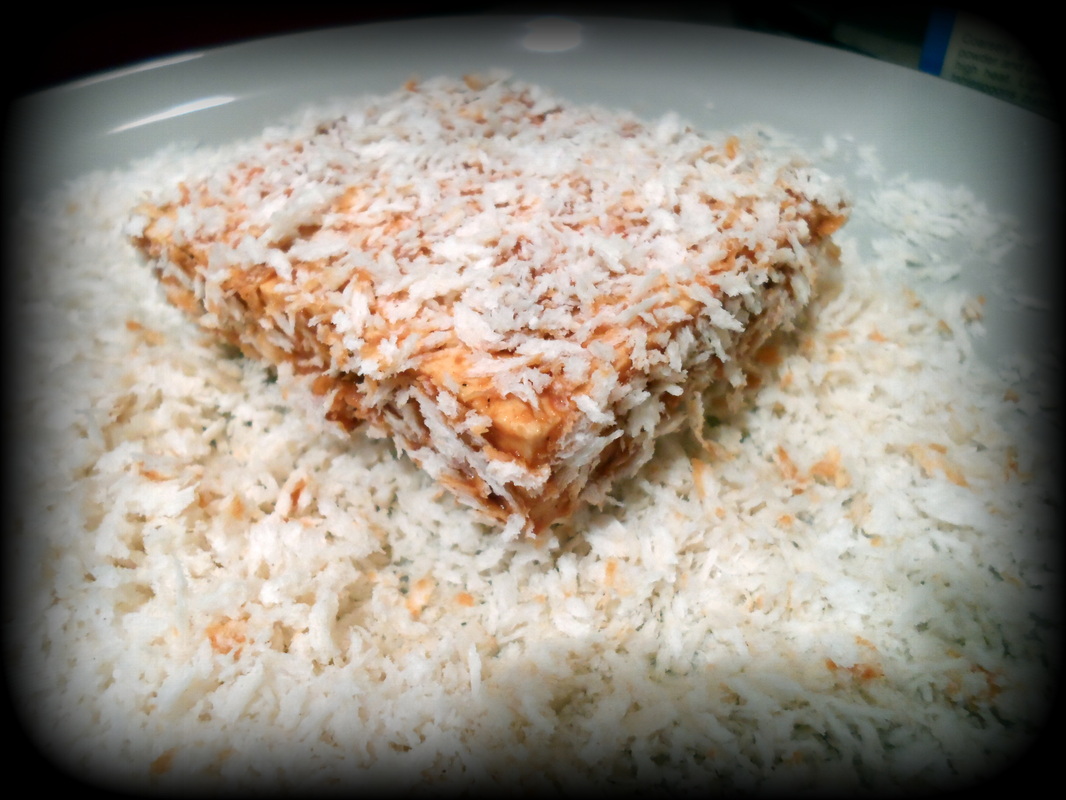
1 cup panko bread crumbs
1/2 of a large white onion, sliced
1 tsp. coconut oil
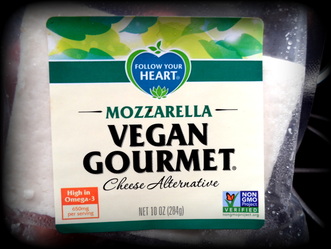
Follow Your Heart mozzarella block cheese, cut into thin slices (I used 2 slices per sandwich)
Vegan buns
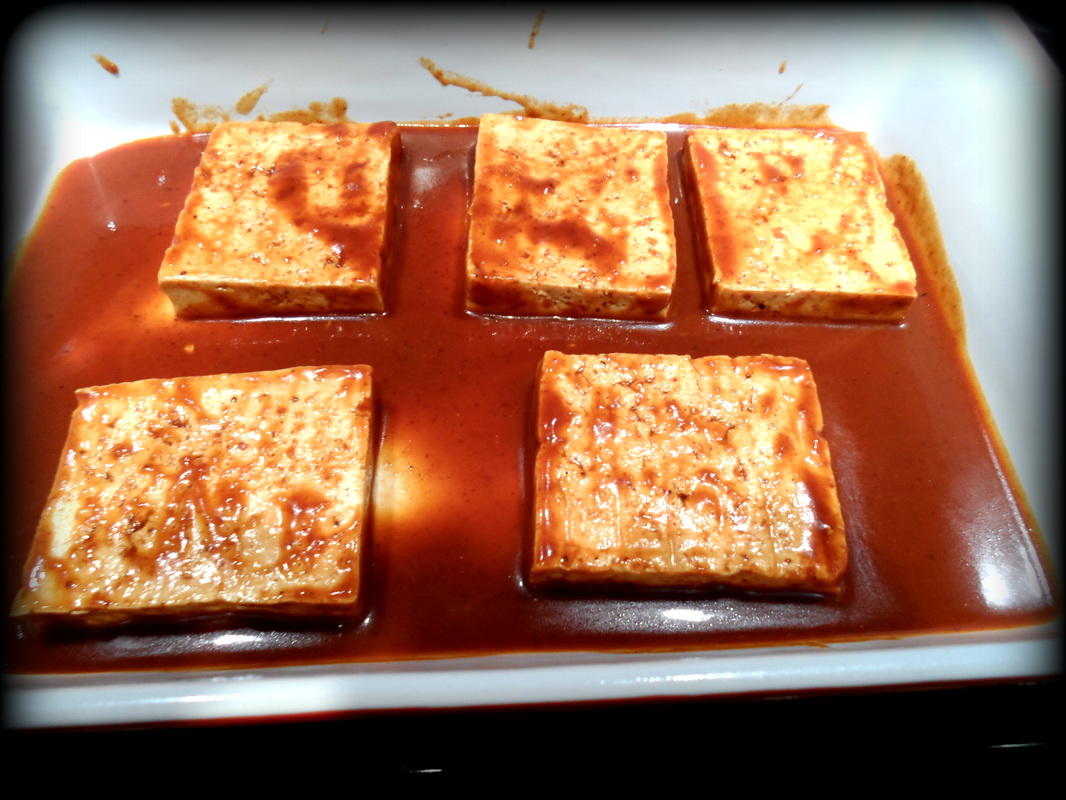
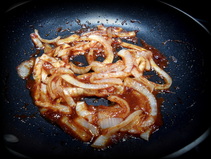
Veganaise How To: Slice the tofu and place on paper towels and/or tea towels, cover with more towels and firmly but gently press most of the moisture out. I used paper towels and went through three rounds of pressing with the towels (our tea towels were in the wash). In a shallow dish, such as a 13'' X 9'' pan, place one cup of barbecue sauce and tilt the pan to cover the entire bottom. This is the barbecue sauce that I used. I absolutely loved it! It was slightly sweet and had a nice smoky flavor that wasn't overpowering. Not ALL jarred barbecue sauces are vegan but I found this gem! I was going to make my own sauce but this saved me from buying 4 extra ingredients. Feel free to make your own! Place the tofu patties in the dish and place in the fridge to marinate for about 15 minutes. After 15 minutes, remove from the fridge and pierce the tofu patties (about 8 times per each patty) with a fork. Flip the patties over (move the barbecue sauce around, if necessary, with the fork to ensure even marination), and pierce the patties with the fork again. Move the patties around to coat the edges with the sauce too! Place the patties back in the fridge and allow to marinate for about 15 more minutes and preheat the oven to 400 degrees. Once the patties are done marinating, remove from the fridge and place the panko crumbs on a dinner plate. Place one patty at a time in the panko crumbs and coat all sides. I did this by placing the patty in the panko crumbs and then gently pressing the crumbs around the edges. I then flipped the patty over and covered it with a mound of panko crumbs from the plate and pressed the crumbs firmly into the patty. Gently remove any excess and place a wire cooling rack that's on top of a cookie sheet like pictured below. A regular cooling rack should do just fine! Using a rubber or silicone spatula, scrape the leftover barbecue sauce in a small dish because we will NOT be wasting any of this goodness! Set the sauce aside for the time being. Bake the patties on the middle rack for 35 minutes or until the panko is golden brown. While the patties are cooking prepare the onions. Place the coconut oil and onions in a pan over low/medium heat and cover. Once the coconut oil has melted, turn the heat to the lowest setting and allow to cook covered until the patties are almost done baking. When there is about 5 minutes left for the patties to cook, add 2-3 spoonfuls of the barbecue sauce to the onions. Turn the heat up to medium/low and cook uncovered to allow the sauce to thicken a bit (about 5 minutes). While the onions are cooking you can toast the buns if you like. I placed my buns in the toaster and turned on the bagel setting to toast just the inside but you can place them on the oven rack or on a griddle if you like. Turn off the heat for the onions when the patties are done and remove the patties from the oven. I used Rudi's hamburger buns because they're my favorite vegan buns! These can be found at Trader Joe's, Health Hut, and Outpost! I usually get the wheat (which are so good and NOT dry) but it was the first time that I saw the white buns so I grabbed them to give 'em a try! These buns are nice and dense and do not fall apart easily or stick to the roof of your mouth!
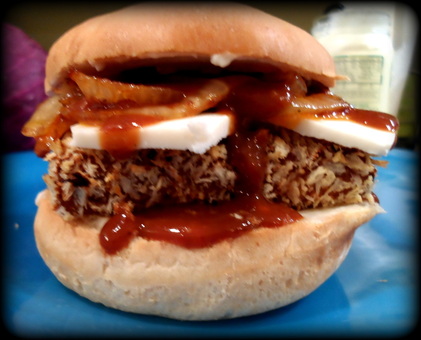
To assemble the sandwiches, smear the bottom half of the bun with a little bit of veganaise, drizzle with a little bit of the remaining barbecue sauce, place the tofu patty on the bun, add two thin slices of the mozzarella cheese (I crisscrossed mine), top with the onion mixture, drizzle with a little more of the barbecue sauce, spread the top half of the bun with a little bit of veganaise, and place the top of bun on the sandwich. Now take a look at that masterpiece, admire it for a second, and take a bite already because I know you're drooling! JUST AN FYI...I'm not really big on vegan cheeses but the mozzarella cheese that I picked up was awesome! It didn't have that tangy overloaded with nutritional yeast, type of flavor. I think this vegan mozzarella really does taste like the actual mozzarella cheese! I was really impressed! I especially loved the soft texture of the cheese too! My husband and I literally inhaled these sandwiches! I served these sandwiches with a basic coleslaw on the side and it was the perfect combination! You could easily adjust the recipe to make just two sandwiches (saving the remaining tofu for a different recipe) and then just half the rest of the ingredients! However, I prefer having leftovers and you can easily crisp these patties up again by heating them in a pan!
I hope you enjoy these just as much as we did!
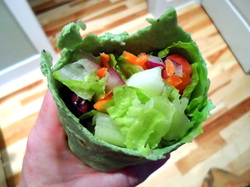 Lately I've been finding myself on a wrap kick for lunch. They're so easy to make and it's the perfect way to use up the leftover produce from the week's dinners. It's also a great way to get your veggies in for the day! This wrap is probably the simplest one I've made yet and it's super good and highly satisfying! For as simple as the dressing is for this wrap it's still extremely flavorful! You could even serve this for dinner with some veggies and hummus on the side (check out my recipe for Red Pepper Hummus).
Ingredients: 1 tortilla wrap
1 & 1/2 cup lettuce (I used romaine)
1/4 cup cucumber, roughly chopped
1/2 of a roma tomato, roughly chopped
1/4 of an avocado, sliced
1/4 cup shredded carrots
1 slice of red onion, chopped
5-6 kalamata olives
olive oil
red wine vinegar
salt & pepper, to taste
oregano How To: Place all of the veggies in the center of the wrap. Drizzle with olive oil (I used about 1 tablespoon) & sprinkle with the red wine vinegar. Sprinkle with some salt, freshly cracked pepper, and oregano. Fold the bottom of the wrap up about 1-2 inches and then fold the left & right side in. Viola! Lunch is served!
 I feel like these last 2 & 1/2 months have just flown by! Although, looking back to when I had my ACI knee surgery on May 6th, it does feel like I've been in recovery longer than 2 & 1/2 months. It's been pretty tough at times but I'm glad that I've been able to remain so positive. I knew going into this that 6-8 weeks of no weight bearing on my right leg would be hard but I didn't imagine that it was going to be as hard as it was! After about a month I was getting anxious to get up and get moving but unfortunately I couldn't just yet. Most of my days were spent lying on my back while hooked up to my CPM & DVT machines while watching television. It may sound fun to most people to lie home all day and watch television but believe me, it's not! I think the hardest part was not being to take care of myself like I was used to and not being able to help out with things around the house. I hate asking for help and I can be extremely stubborn. So, it was hard to hand everything over to my husband; especially the cooking and cleaning! Bless my husband's heart for being so incredibly patient, understanding, and willing to take care of me. I don't know how I could've gotten through all of this without him!
So, for the first month or so we mostly ate vegan convenience foods and very simple homemade vegan meals. I had to talk my husband through step by step directions on how to prepare the homemade meals...it was pretty comical at times! I think the hardest part for him was the grocery shopping because I'm usually the one that does the shopping. So, sometimes he would come home frustrated because he was reading the ingredient list on a lot of items to ensure that it was made vegan but other times he would come home excited with new vegan treats that we haven't tried yet! After about a month of this vegan convenience eating I found my body really craving more whole foods.
I love the fact that there are vegan convenience foods on the market because sometimes in certain situations you need them but I don't think I could eat off of these every day! I found myself lacking energy and just not feeling 100% when eating mostly vegan convenience foods but my body has never seemed to thrive on processed foods anyways. However, I would much rather eat vegan convenience foods vs. non-vegan convenience foods because when I was a not vegan and I would eat heavily processed foods I always felt sick! I would end up with horrible stomach aches, other unmentionable issues, and I would feel terrible. I have found that I do NOT have those types of sensitivities with vegan convenience foods; it's more of just a slight lack of energy. Once I was more comfortable and mobile, I started to go grocery shopping with my husband and whiz around on one of those motorized carts! I'll never forget the one day when we were grocery shopping and an elderly gentleman pulled up next me in his motorized cart and asked, "You want to race?" I couldn't stop laughing! I thought it was so cute! Anyways, the more whole foods that we incorporated into our diet the better we both felt. I chose simple meals that didn't take a long time to make or didn't include much prep work. Most of these meals can be found in the "30 minutes or less" archive tab.
Right now, I've been learning how to walk again! It's a bit harder than I expected but I'm determined! I've been using one crutch for getting around the house for as long as I can tolerate. Each day seems to get better than the last! I've been able to tolerate spending more time in the kitchen to prepare meals; Although, I still need some assistance from my husband but it feels great to be back in "my place" (the kitchen). Cooking for me has always been a stress reliever and a way to express my creativity. I love that I'm still able to do so by cooking tasty vegan food!
I'm looking forward to a lot of new things in the very near future! In 1 month I should be walking without the crutches and able to finally drive! I'm excited to explore & create more vegan recipes and I'm extremely interested in incorporating more raw foods! As always, I will be keeping you up-to-date with my progress and new vegan recipes!
 This hummus can be whipped up in 10 minutes or less! This recipe is simple to make and is perfect for a light lunch or served as an appetizer. It's been really hot lately (above 90 degrees all week and really high humidity) and this weather has me craving some light and refreshing foods. This is what I served myself up for lunch and it really hit the spot and helped me to beat the heat!
Ingredients: 15 oz. can garbanzo beans, rinsed & drained
1/2 of a red pepper, quartered
2 tbs. tahini
1/2 lemon, juiced
1 garlic clove, smashed
1 tsp. cumin
1/2 tsp. paprika
1/2 tsp. salt or to taste How To: Toss all of the ingredients in a food processor and blend until smooth making sure to scrap the sides one time! Allow to chill for 30 minutes or you can eat some now and refrigerate the rest for later (that's what I did)!
 * * * * *
My only regret is not trying this recipe sooner because both my husband and I agree that these cookies ARE the best oatmeal raisin cookies that we've had! My husband took one bite and said, "These taste too good to be vegan!" This recipe gets 5 huge stars! I found this recipe on Twitter and it's from the Vegan Lyfe blog. These cookies were easy to make and it used basic ingredients. They were perfectly soft, slightly chewy, and crispy around the edges...that's my idea of the perfect cookie! These cookies are a MUST make if you love oatmeal raisin cookies!
What I Did Differently: The recipe called for 18 cookies but I made my cookies a little bit smaller and made 24. I baked the cookies for 10 minutes and they came out perfect! Overall Thoughts: I will be making these cookies again! I don't think I'll have a choice because I have a feeling that my husband will be asking me for these often! These cookies go on my favorite list!
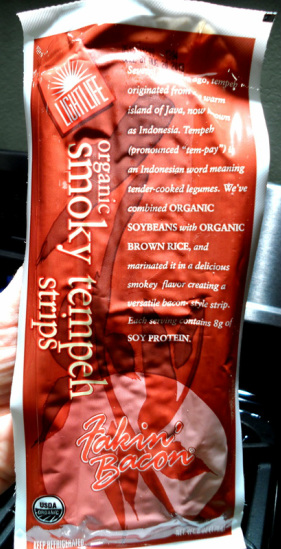
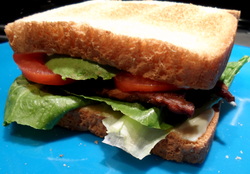 Summer, means fresh homegrown tomatoes and fresh tomatoes mean that it's time for a BLT! It never ceases to amaze me that there are so many alternative options on the vegan market! I've really been having a craving for BLT's lately and I blame it on my good lookin' tomatoes in my garden that have been staring back at me! I came across several recipes to make "bacon" at home but I just haven't tried it out yet. I will put that task on my "To Do" list! However, this past weekend while my husband and I were shopping at Outpost something had caught my eye. I was picking out some tempeh for our spicy sushi rolls that we were going to make that night and I spotted this lovely package...
Pure excitement came over me because that was the first time that I've spotted a bacon alternative in the grocery store! I looked to my husband and said, "Look its bacon!!!! We have to try it!!! Can we get it?!?!" Of course my husband couldn't say "no" to my pure joy! I couldn't wait to try it out!
So last night we decided to have the BLT's for dinner and it was a complete success! I had fallen in-love with my vegan BLT. I actually finished my sandwich before my husband finished his! To prepare the bacon all you do is fry it in a pan with a touch of oil until the edges are crispy. This bacon is a tad sweet and a little smoky. We both really enjoyed the flavor. I wish that it could have been just a bit more smoky and peppery. You could easily make it more peppery by dipping the edges in some ground black pepper and then fry it up in the pan! It's just a personal preference of mine but I do love my pepper! Overall, I think I would buy this product again if I don't have the time to prepare my own homemade "bacon"! I think this bacon is a perfect option! It's certified vegan and USDA organic. For more product information and to find it in a store near you, please check out this link. We kept our BLT's simple and just used veganaise, romaine lettuce, the tempeh bacon, tomatoes from our garden, and a couple of avocado slices. It was perfect! I served the sandwiches with fresh cucumber slices with a pinch of salt and freshly ground pepper on top. Delish!
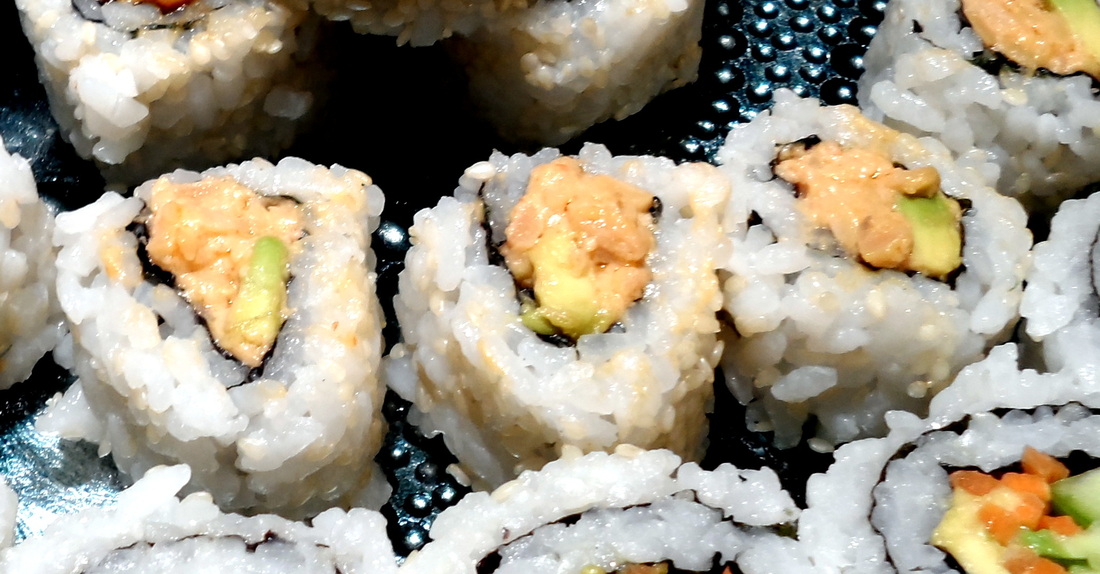
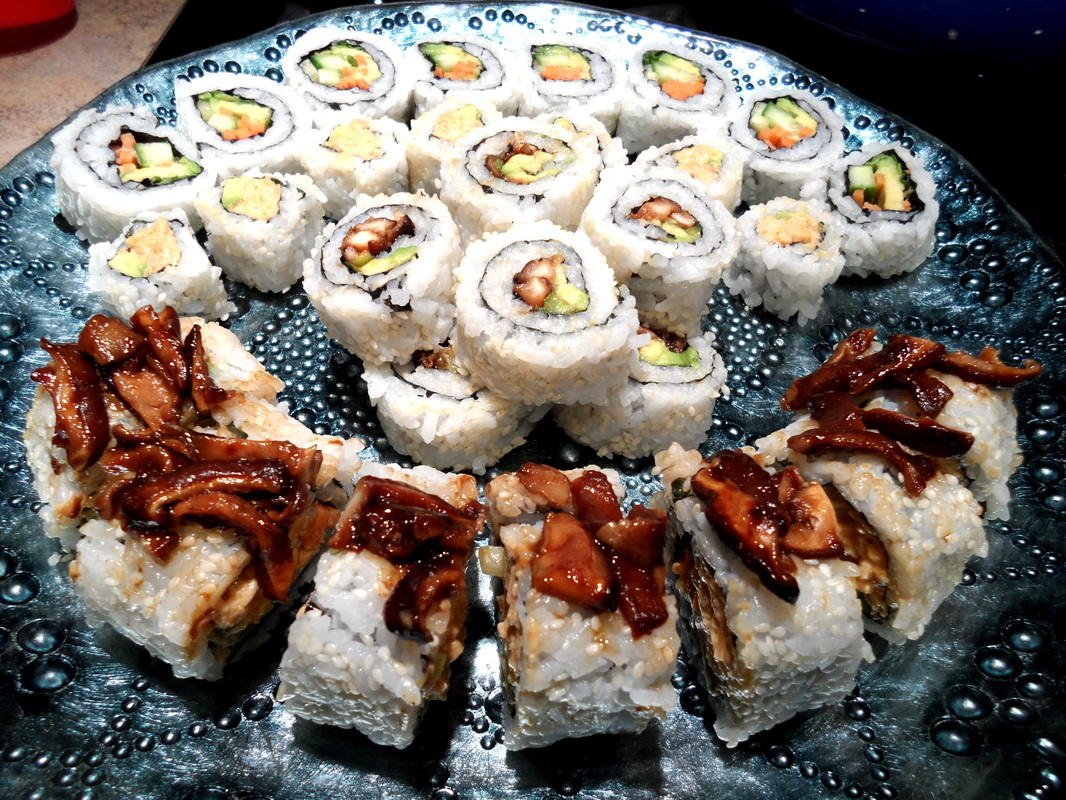
 Lately, I have really been wanting sushi and I wanted to create something that would ease my craving! So, my husband and I decided to do Sunday night sushi...homemade vegan style of course! Overall, it was a success! It's been awhile since we've done homemade sushi and I was surprised that our rolls came out as good as they did because doing the "inside out" rolls can be tricky! After watching several YouTube videos my husband nailed the technique! We ended up making a veggie roll, a spicy roll, a shiitake mushroom roll, and then what we call a "kick your a**" roll (a combo of a little bit of everything). All rolls were good but the shiitake mushroom roll was the star of them all! The "kick your a**" roll was just too much to chew on. The spicy roll was so AWESOME!!! The veggie roll just really hit the spot!
The thing that I love about sushi is how you can be so creative! I had been craving one of those creamy and spicy rolls, and after much thought I decided to go with tempeh! Ugh, I would've never thought that this would have turned out so awesome! At first, I was thinking of using tofu for the filling but I figured that it would be too mushy. I'm really glad that I went for the tempeh! I've had tempeh before and I didn't care for it but I could it all day in the form of a spicy sushi roll! For the shiitake mushrooms, I ended up marinating them in some hoisin sauce, dry sherry, and some low-sodium soy sauce. Then I dumped the mixture in frying pan and cooked it up until all of the juices evaporated. It was DIVINE!!!!
So if you're looking for some new and interesting vegan sushi rolls then check out my recipes below!
Ingredients: Nori sheets
Sushi Rice:
1 & 1/2 cup uncooked sushi rice
2 cups water
1 & 1/2 tbs. rice vinegar
1 & 1/2 tbs. vegan sugar (I used Florida Crystals)
1/2 tsp. salt
Shiitake Mushroom Roll:
1 cup sliced shiitake mushrooms (stems removed)
2 tbs. hoison sauce
1 tbs. dry sherry
1tbs. low-sodium soy sauce
Spicy Roll:
1 package tempeh
veganaise
sriracha sauce
Veggie Roll:
avocado slices
cucumber slices
matchstick carrots
green onion How To: Sushi Rice:
Prepare the sushi rice by placing the rice in a mesh colander and rinse until the water comes out clear. Add the rice to a medium saucepan and add 2 cups of water. Turn heat on high and let rice come to a gentle boil. Cover and turn heat to low (I used the lowest setting), cooking for 15 minutes OR until all liquid is dissolved. Make sure not to remove the lid or stir the rice when it is covered! Remove the rice from heat and let stand covered for 10 minutes then transfer the rice to a bowl when finished. In a small microwave safe bowl combine the vinegar, sugar, and salt with a whisk and microwave for 45 seconds. Whisk once more until blended and then pour over the rice. Mix thoroughly until well blended. Allow the rice to cool to room temperature (I cheated a bit and I ended up placing it in the fridge after a while to help it cool because we were getting too hungry!). Shiitake Mushroom Roll: (Pictured above)
Add the shiitake mushrooms to a shallow bowl or Ziploc bag and add the hoisin sauce, dry sherry, and soy sauce. Stir or shake until the mushrooms are coated evenly. If using a bowl, place a cover on top and place the mixture in the fridge. If using a Ziploc bag, just simply seal it and place it in the fridge. Allow the mushrooms to marinate for at least 30 minutes. I marinated my mushrooms for 1 hour because I wasn't in a rush.
Place mushrooms in a small frying pan over low-medium heat and cook until the juices evaporate (about 5 minutes).
Wrap a bamboo sushi mat with plastic wrap. Place nori on the sushi mat. Wet your hands with water and form some sushi rice in a large ball. Spread the sushi rice on the nori leaving at least 1/2'' of uncovered nori at one end. Make sure that the rice is 1/4'' thick (you should still be able to see through to some of the nori). Sprinkle with sesame seeds. Flip the nori sheet over using your hands. Add the desired amount of mushroom mixture to the middle of the nori (just a bit closer to the end of the nori without the rice). Place several slices of avocado and some green onions on the mushroom mixture. Now, using the bamboo mat, take the side of the nori without the rice on the end and roll over the filling completely. Tug the bamboo mat back gently to ensure that it's tight and everything is secure. Continue to roll until the end and then gently squeeze the roll with the bamboo mat still in place. Slice with a very sharp knife and serve!
This is the video we watched but we used full sheets of nori because ours were too small to cut in half. Start at 1:55 to see how to roll it. Spicy Roll: (pictured above)
Place the tempeh in frying pan with about 1/4'' of water. Turn heat to medium/high and bring to boil. Cover, turn heat to low and steam for 10 minutes. Place tempeh in a bowl (without the water) and mash with a fork or potato masher until somewhat chunky and smooth. Add the veganaise until your desired consistency but make sure it isn't too mushy (I believe that I used about 4-5 tbs. of veganaise). Stir in the sriracha sauce to taste. I added about 2 tbs. because we like ours spicy! Cover, and let cool in the fridge until chilled (about 1 hour) or stick it in the freezer for 30 minutes if you can't wait!
Use the exact same concept stated above in the shiitake roll recipe on how to roll this roll except fill this roll with the tempeh mixture, several avocado slices, and some green onions. Veggie Roll: (pictured above)
This one is easy! Use the same concept for the rolling but fill this one with cucumber, carrots, avocado, and green onion!
|


 RSS Feed